How to Clean Pool Tiles with a Pressure Washer – Step by Step Guide
Are you considering taking a relaxing dip, going to throw a pool party, or just practicing your swim form? If so, you have to make sure your pool is sparkling clean.
Pool maintenance is one of the things you’ll have to do when you install your pool, but it’s well worth it if you have the correct tools on hand and are ready to go.
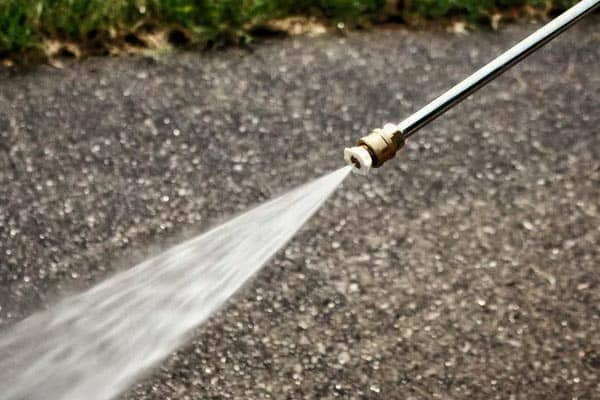
To clean the pool with the pressure washer, you’ll put on protective clothing, set up the pressure washer, clear the pool area, switch on the low pressure to clean any surface-level debris and dirt, and clean small areas at one time.
You’ll have to slowly increase the pressure to clean stuck-on dirt, and you‘ll want to swap out nozzles and attachments for tighter spaces and tough stains to get your pool walls clean.
So, if you’re interested in learning how to effectively clean your pool with a pressure washer without causing any damage to the tile, this is for you. We’re going to outline the entire process for you below.
Is it Possible For You to Use a Pressure Washer to Clean the Pool Tiles?
Pool tiles usually feature either porcelain or ceramic, and this means that your pressure washer can easily cause damage. But if you know how to clean them properly, you can wash your pool tiles with this unit without causing any unnecessary damage.
You’ll start by cleaning all of the debris that is hanging in and around the pool by hand and removing all of the dirt from the bottom of the pool.
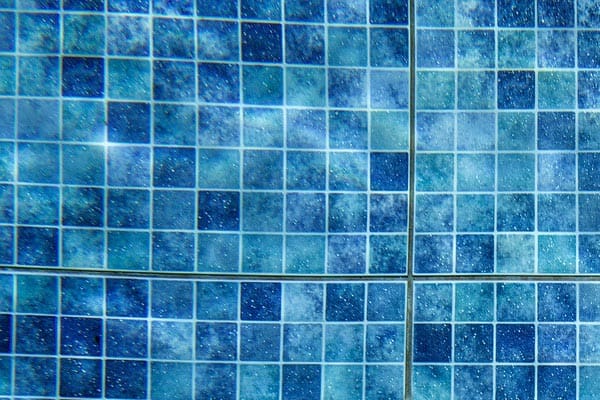
Most pools have tiles at the top of the walls, and you’ll usually have two or three lines of tiles running around the sides of the pool.
A lot of the time, the tiles end up with a coating of algae and calcium at, above, and under the waterline.
To get all of the dirt off of your tile and restore how it looked previously, it’ll take some chemicals and a lot of effort on your part.
Generally speaking, you’ll clean the tiles around your pool with a pressure washer to restore them rather than try and replace them. However, you have to be careful during this process because it can easily lead to cracked or chipped tiles.
You don’t want to set up a large amount of pressure right away, so it’s good to start low and gradually build the pressure levels up. By using a lower pressure for this project, you will avoid causing any cracking or chipping tiles.
Luckily for you, a pressure washer is more than strong enough to clean away all types of dirt and grime accumulation on the tiles to make them look new. As long as you take extra care and take your time, you shouldn’t have a huge problem.
Why Calcium Deposits Build Upon Pool Tiles
Your water’s hardness level is the main cause of calcium buildup. Water that has a hardness level of over 400 PPM can cause calcium buildup and scale right at your pool’s waterline on the tile.
If you let the pH value of your water rise, you’ll see calcium deposits build up worse at the waterline to turn your tile a chalky white color.
During the summer, the water temperature will go up, and the water will evaporate to allow for calcium buildup too.
How to Use a Pressure Washer to Clean Pool Tiles
We want to help you completely refresh your pool tiles, so we’ll walk you through all of the necessary steps and tools you’ll need to complete this project in one go. You will need:
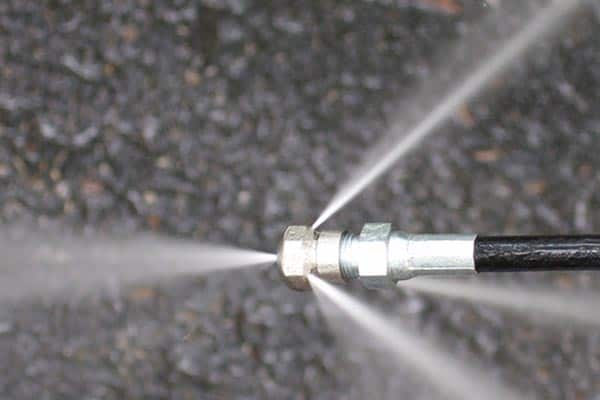
- A pressure washer with a PSI rating between 1,200 and 2,600. If you decide to go over 2,000 PSI, test it on a small area of your pool and use a wide spray nozzle to check for damage.
- Protective shoes and clothing
- Variety of attachments and nozzles, inciting a long spray gun
Tip:
- Don’t use any type of detergent for this project because it can get into the pool water and throw off your water chemistry. If you have stubborn stains, you can try steam cleaning them too. This will get rid of bacteria, germs, and buildup.
To start, you want to put on your protective clothing and set up your pressure washer. If it can reach higher temperatures, pick steam or hot water as you set it up. If not, it will still work, but it’ll take a little longer to finish this project.
Clear out your pool and get rid of any debris using your pool vacuum or net. Clean the area around your pool at this time too, and put away any pool tops because they can reflect the water and get in your way and cause injuries.
Test out the desired pressure for this job, and we recommend starting very low with the widest nozzle to start and get rid of the first layer of dirt and debris.
Sweep along your pool tiles using a horizontal motion for 30 seconds to clear out the surface dirt.
Start cleaning small areas of tile at one time, gradually upping the pressure you use or changing out the nozzles until you find the best fit for your needs.
Make sure each section is clean before you go to the next, so you don’t have to come back and repeat cleaning it.
When you get to tough grout lines, tight spaces, or corners, you’ll want to change out attachments or nozzles as you see fit to make the job easier. A longer spray gun can help you get in all of these areas without wasting a lot of time.
Once you finish the project, switch off the pressure washer and disconnect it. Pull the trigger to allow any leftover water and pressure to release.
Allow the area to dry thoroughly, especially if you have tile around the pool that will now be wet and a slipping hazard.
Five Tips to Clean Your Pool Tile with a Pressure Washer
Cleaning your pool with a pressure washer is a bit different than cleaning the pool as you traditionally would.
This is why the following tips will help you complete the project and leave your tiles clean without any damage.
1. Pick Out the Correct Pressure Washer
You have to pick out the correct pressure washer to have success at this project, and steam pressure washers have proven to be very efficient.
Pick out a pressure washer that can heat the water to around 300-degrees Fahrenheit to ensure you sanitize the pool properly.
2. Clear Your Pool
It’s impossible to clean the pool tiles if your pressure washer is full of water, and this is why you need to clear out the pool water first.
You may leave the water in if you get a waterproof pressure washer to use for this project, but you do need to remove all of the debris from in and around the pool. The cleaner the area is, the quicker you can complete your project.
3. Pick the Right Pressure
Depending on the unit you picked out when you bought it; it might tell you the exact pressure you need to use to clean your pool tiles.
Ideally, you’ll always start on the lowest setting to ensure that you don’t cause any damage and slowly go up.
Run the pressure washer in one area and increase the pressure if you notice that it’s not getting the tiles as clean as you would like.
If you see that the upcoming tiles or grout have damage, lower the pressure to stop from making it worse.
4. Clean in Sections
It’s a good idea to clean your pool tiles one section at a time by taking the time to pressure wash a specific squared-off area and not moving to the next one until it’s 100% clean.
This could seem tedious and eat up a decent amount of time, but the clean tiles are worth it. If you do this, you shouldn’t have to come back to a section because you notice you missed something and still have stains.
5. Keep the Correct Distance
Pressure washers release jets of very powerful and concentrated water, so you have to keep a good distance between the tile and the pressure washer’s nozzle.
A portable pressure washer makes this easy, and you should try to keep yourself a good distance away to prevent burns from water splashing back on you. This is usually a minimum of afoot, but it can be further away.
Bottom Line
You can safely use a pressure washer to clean your pool tiles if you follow our simple guidelines and safety tips.
Doing so will allow you to get sparkling clean tiles without any damage and a pool you can’t wait to show off.