18 Ceiling Texture Type and Benefits
It could be a tough decision for you if you’re trying to figure out whether or not you should texture your ceiling.
There are dozens of ways to make your ceiling look more stylish, and this can also make it hard to pick out a specific texture to go with.
A textured ceiling is usually easy to install, depending on the pattern or texture you choose because some are much more ornate than others.
Some textures may fit better into specific room types, and other textures may fit better in several rooms.
Knowing the 18 most popular ceiling textures is a great way to start searching for the perfect ceiling texture to suit your needs.
You should also know what each texture brings to your home because this will help you narrow down your choices even further.
In this article, we’re going to outline and summarize 18 different types of ceiling textures.
You’ll get an excellent overview of each one, and you can decide which one will look best on your ceiling, no matter if you want to refresh or upgrade it.
1. Crows Foot
You’ll need a stipple brush available to make this ceiling texture, and it’s a two-person job because you’ll need one person to apply it using the brush pattern and one to apply the mud to the other sections of the ceiling.
Applying this texture can be a very messy project, even if you’re very careful, so you’ll want to wear older clothing and lay down plastic drop cloths before you start. Work on one section at a time while you move across your ceiling.
2. Fish Scale
You’ll most likely need to hire a professional to take on this job because it’s very complex and time-consuming due to the smaller design.
The ceiling will look fantastic when you finish by giving it an artistic touch that draws the eye, and it’s a great choice if you have more plain walls because you want this pattern to stand out.
However, you want to avoid busy patterns on the wall since this is a busy pattern itself, and they can overwhelm you if you look at them both in one room.
3. Hawk and Trowel
Just like the name suggests for this ceiling texture; you’ll have to have a trowel and hawk to get it to turn out correctly.
This texture type falls into the drywall ceiling category, and it gives you a very dramatic look when you finish it because it’s not smooth or flat to the ceiling.
It doesn’t require a very high skill level to accomplish, so it’s one that you could attempt to do on your own without the help of a professional.
4. Knockdown
If you want to apply this ceiling texture, you’ll have to have a watered-down joint compound to get a light consistency before you apply it. You’ll also need to get your hands on a knockdown tool to apply it.
If you can’t find one, you could also try using a trowel, but this makes it much more challenging. You’ll get a small circular pattern that also looks nice on the wall.
5. Lace
Lace is one of the most difficult ceiling textures to apply, but it can also give you some of the most intricate and beautiful results.
You’ll need a plastic sheet to cover the floor and furniture, a spatter gun, a drywall knife, and several other tools to pull it off. You basically freehand a lace design into the wet plaster so that it can be unique.
6. Orange Peel
As the name suggests, this is a lightly textured pattern for your ceiling that looks like an orange peel.
To make this ceiling texture, you’ll need to apply a very thin layer of mud by spraying it with a gun. The gun should be set at a higher pressure to create the texture, and it’s better known as an eggshell texture.
7. Popcorn
Popcorn ceilings are also called acoustic ceilings, and it’s one of the most well-known textures available.
The look gives you a rough and bumpy texture that looks like popcorn from a distance, and you apply it using a sprayer. It contains mud, but it also has a styrofoam material that will give it a very puffy effect.
It’s not easy to remove once it’s on, so you do have to make sure you really want this ceiling texture, and it’s also not easy to apply evenly. You should hire a professional, so you don’t make a huge mess.
8. Rosebud
Rosebud texture is also popular because it’s relatively easy to apply while giving you beautiful results.
You have to apply a very thin layer of material to the ceiling to ensure that you can make this texture over another texture with sharp edges.
You’ll need an airless paint sprayer or a stomp brush to accomplish it, and it works well when you pair it with smooth walls.
9. Sante Fe
This is a variation of the skip trowel ceiling texture, and they both fall into the drywall ceiling texture category. They’re so similar that people can easily confuse them, and the installation process is the same.
The Santa Fe texture will cover a larger area than the other one, though, so you have to have it on more than 60% of the ceiling for it to be a true Santa Fe texture.
10. Scalloped
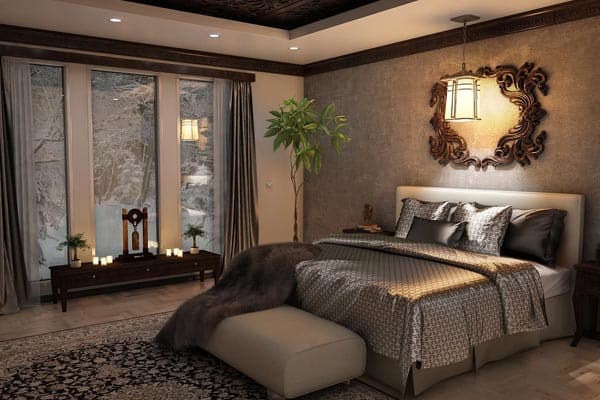
You can apply the scalloped texture to the bedroom ceiling, and it can give the illusion that it’s going to melt down your wall if you apply it correctly.
Having pale-colored walls and a white ceiling will give this room a dreamy look and feel, and you get a very subtle texture with it. So, it also works well with louder colors or wild wallpaper patterns to help create balance.
11. Sheetrock
Sheetrock ceiling texture falls into the drywall ceiling texture category, and it’s been very popular since 1917. You’ll get a very smooth texture with it like most drywall ceiling textures, and it can lend an artistic look to the ceiling.
You use a hand technique without a spray gun or special brushes to achieve it, and it goes with everything from a very modern and chic decor to a more rustic and farmhouse.
12. Skim
If popcorn ceiling texture seems difficult to install by yourself, you don’t want to attempt a skim ceiling texture on your own either.
It allows you to create a very flat or even surface on your ceiling, and it works well for trying to make your ceilings look new again after a texture removal process.
13. Skip Trowel
Just like most of the textures in the drywall category, you can get a trowel and apply this texture by hand on your own.
All you have to do is dip your trowel in a joint compound and drag it gently across your ceiling. The compound will cover the majority of your ceiling when you finish, and you’ll get a smaller circular design with this technique.
14. Slap Brush
This is another option that isn’t easy to apply on your own, and you’ll need to apply a very thin layer of mud to get a brush with stiff bristles for it to work well.
You’ll get a roller and cover the ceiling with mud for the first step before using the brush to slap the ceiling from the edges. Eventually, you’ll end up with a nice pattern, but it’s a messy application process.
15. Smooth
Even though some people do want some texture on their ceilings, smooth is a very attractive option because it’s cost-effective, can give you a consistent look, and doesn’t require a lot of skill to apply.
Most textures are difficult to remove, and this means that you’d have to call in a professional, but this choice is easy to apply, remove, and it works for virtually any room style.
16. Spray Sand
This texture looks very similar to orange peel texture, and it’s a fantastic way to hide any imperfections in your ceiling while looking artistic.
However, this texture isn’t hugely popular today as it can look dated. You’ll need a bag of sand texture that you mix with cold water and let sit overnight before you apply it to the ceiling.
17. Swirl
A swirl ceiling pattern requires a great deal of patience because it can be very intricate. You can apply it using a sprayer or a roller, and the basic swirl method is another option that uses a trowel.
The swirl effect you get will depend on the tool you use, but you have to work quickly.
The goal is to get all of your swirl patterns in before the plaster dries out, so you’ll most likely need another person to assist you in ensuring you finish in time.
18. Tree Bark
Just like you’d guess from the name, tree bark texture looks like tree bark. You can install this texture using a very heavy roller, and it can work to help draw people’s attention more toward the ceiling in the room. It can be a perfect style if you have a farmhouse design aesthetic because it’s very simple but unique.
Why You Should Apply a Ceiling Texture
The look of your ceiling will depend entirely on your personal tastes, and some people prefer it to have a flat, classic look while others like something with dimension to make it more eye-catching.
It really all boils down to which one will complement your personal style and room design better.
Trying to get a perfectly smooth finish on your ceiling can take a huge amount of effort and time, and choosing a texture can help disguise any minor imperfections that could be present.
So, if you’re blending the new ceiling’s look into a new one or adding on, consider applying a texture.
Some textures could also reduce how much it cost for the original ceiling install because it takes fewer trips and less time for the team to apply a texture than it does for them to get it 100% smooth.
Texture can also add an air of dimension and depth to the room that you wouldn’t get with a traditional flat ceiling.
If you have a bigger room with a lot of natural light, a textured ceiling’s bumps and ridges will look different at all houses due to the shadows they cast, which adds more visual interest.
Tools You’ll Need to Texture a Ceiling
There are a few helpful tools you’ll want to have on hand if you’re going to try and texture your ceiling yourself. They include but are not limited to:
- 5-Gallon Bucket – This bucket will help hold the joint compound or paint you’ll use to create the texture on the ceiling.
- Drill with a Mixing Paddle – There is a lot of mixing involved when you create textures, and having a drill with a mixing paddle can speed up the process.
- Drop Cloths – Applying textures to your ceiling can be very messy, so putting drop cloths down on the floor and covering your furniture can make the cleanup process quick and easy.
- Drywall Compound or Spackle – Spackle or drywall compound can be useful for hiding imperfections in your ceiling as you apply the texture. It gives you the ability to apply a quick-drying patch.
- Drywall Knives – A drywall knife can help you put a more intricate pattern into the mud on your ceiling, especially a lace one. Ideally, you’ll get a set of knives in different sizes.
- Rollers and Paint Brushes – A lot of the textures on the list used a roller or some type of paintbrush to apply them, so having a few on hand is nice.
Bottom Line
We’ve outlined 18 different ceiling texture types for you to consider if you’re going to upgrade or revamp your current ceiling look.
You can look and consider which one will work best with your current decor and room style to update and refresh your current look into something beautiful.